Setting up Development Environment
This section covers the details of setting up your development environment. You can set it up yourself or get a pre-configured virtual machine, from MRS Electronic.
Download the latest version of VirtualBox according to your device’s architecture.
Pre-Configured Machine
Section titled “Pre-Configured Machine”If you are using a pre-configured virtual machine from MRS, you can simply install it and jump to the Setting Up NeuralPlex section. The virtual machine is already setup for the development and cross-compiling.
Manual Configuration
Section titled “Manual Configuration”To configure your machine manually, the following requirements must be fulfilled:
System Requirements
Section titled “System Requirements”| Component | Requirement |
|---|---|
| Operating System | Modern Linux distribution (Ubuntu 2024.04, Fedora, Debian, CentOS) |
| Processor | Quad-Core |
| Memory | 8GB of RAM |
| Disk Space | 50 GB of free disk space |
Software Requirements
Section titled “Software Requirements”| Software | Ubuntu 2024.04 |
|---|---|
| Build Essential Tools | build-essential |
| Qt 6.8.1 Dependencies | libxcb1 libxcb1-dev libxcb-keysyms1-dev libxcb-image0 libxcb-image0-dev |
| Development Libraries | libgl1-mesa-dev libglu1-mesa-dev libxrender-dev libfontconfig1-dev |
| Other Useful Tools | pkg-config git cmake |
Required Permissions
Section titled “Required Permissions”You require admin privileges to perform the steps of installation.
Installation Steps
Section titled “Installation Steps”The steps of installation are as follows:
- Install the latest version of Ubuntu.
- Setup Qt development environment by downloading the latest version of Qt. At the time of writing this document, the NeuralPlex has Qt 6.8.x installed. Navigate to this link to find the steps to install Qt6 in Ubuntu.
- Run the installer to begin the installation process.
- Open Qt Creator
- In Qt Creator, go to Edit -> Preferences
- Select the
Devicesitem
- Click “Add” -> “Remote Linux Device” and give it the name
NeuralPlex.- In the
Host Namefield, enter192.168.5.100 - In the
Usernamefield, enterroot - Make sure the USB cable (gray connector) is connected from the NeuralPlex to the development machine. Your development machine should have a
usb0interface and have a static IP address of192.168.5.101, netmask of255.255.255.0, and gateway set to192.168.5.100. - Click “Test” and confirm that your development machine is able to connect to the NeuralPlex
- In the
- Select the
Kitsitem - Click on the
Debuggerstab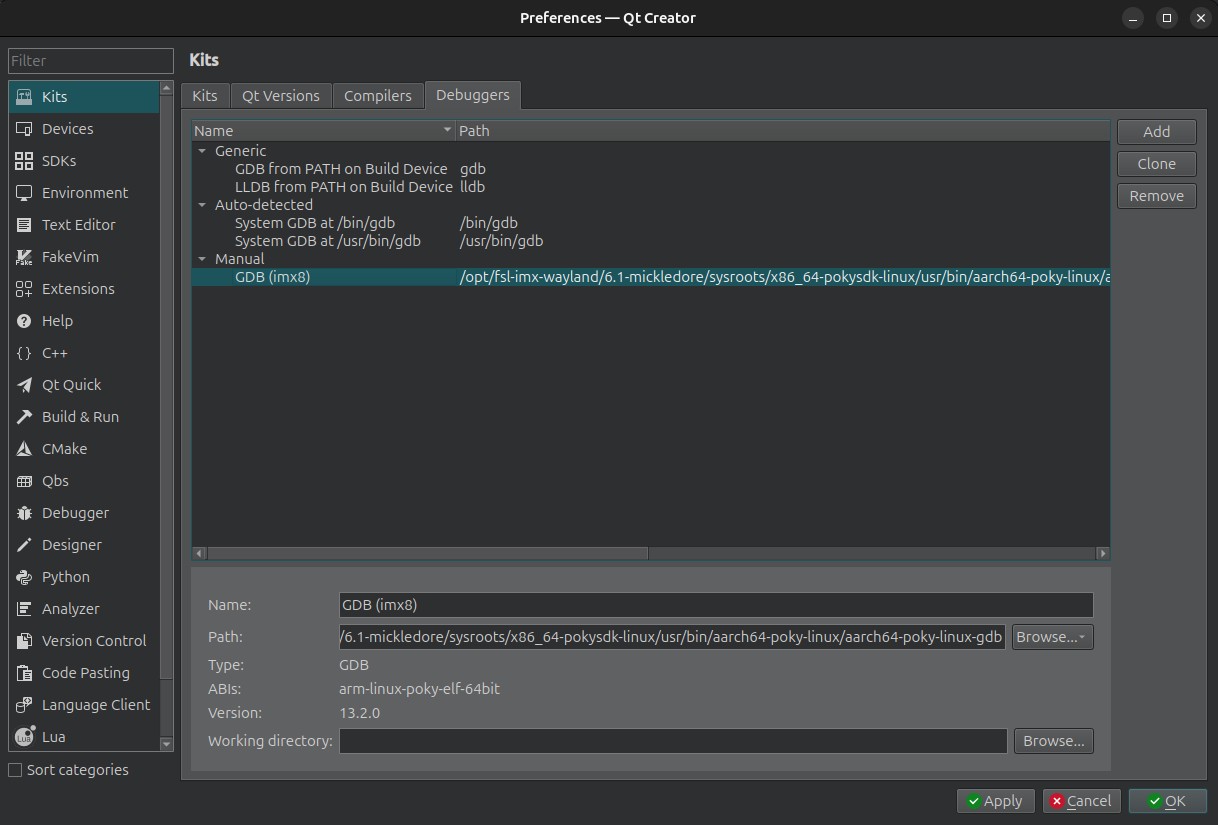
- Click “Add” and give it the name
GDB (imx8). The debugger path is:/opt/fsl-imx-wayland/6.1-mickledore/sysroots/x86_64-pokysdk-linux/usr/bin/aarch64-poky-linux/aarch64-poky-linux-gdb - Click on the
Compilerstab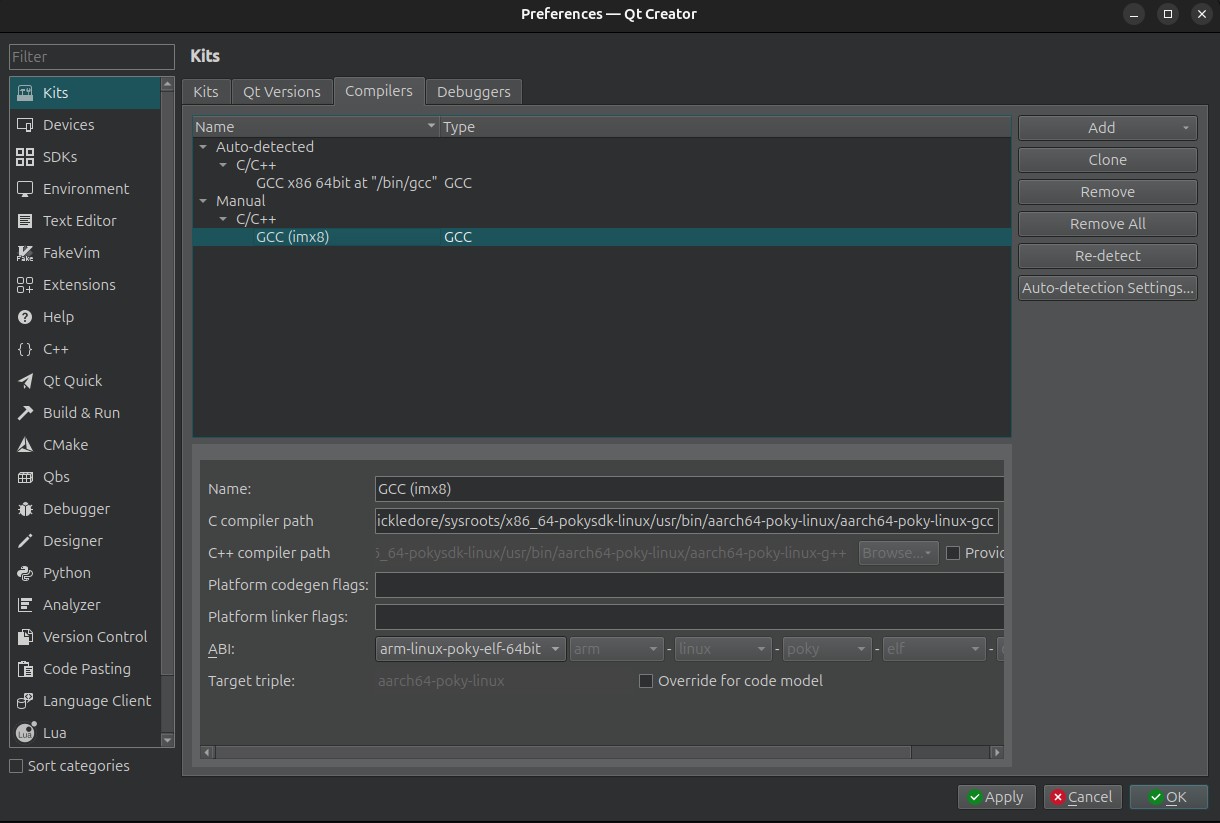
- Add a GCC compiler and give it the name
GCC (imx8). The compiler path is:/opt/fsl-imx-wayland/6.1-mickledore/sysroots/x86_64-pokysdk-linux/usr/bin/aarch64-poky-linux/aarch64-poky-linux-gcc - Click on the
Qt Versionstab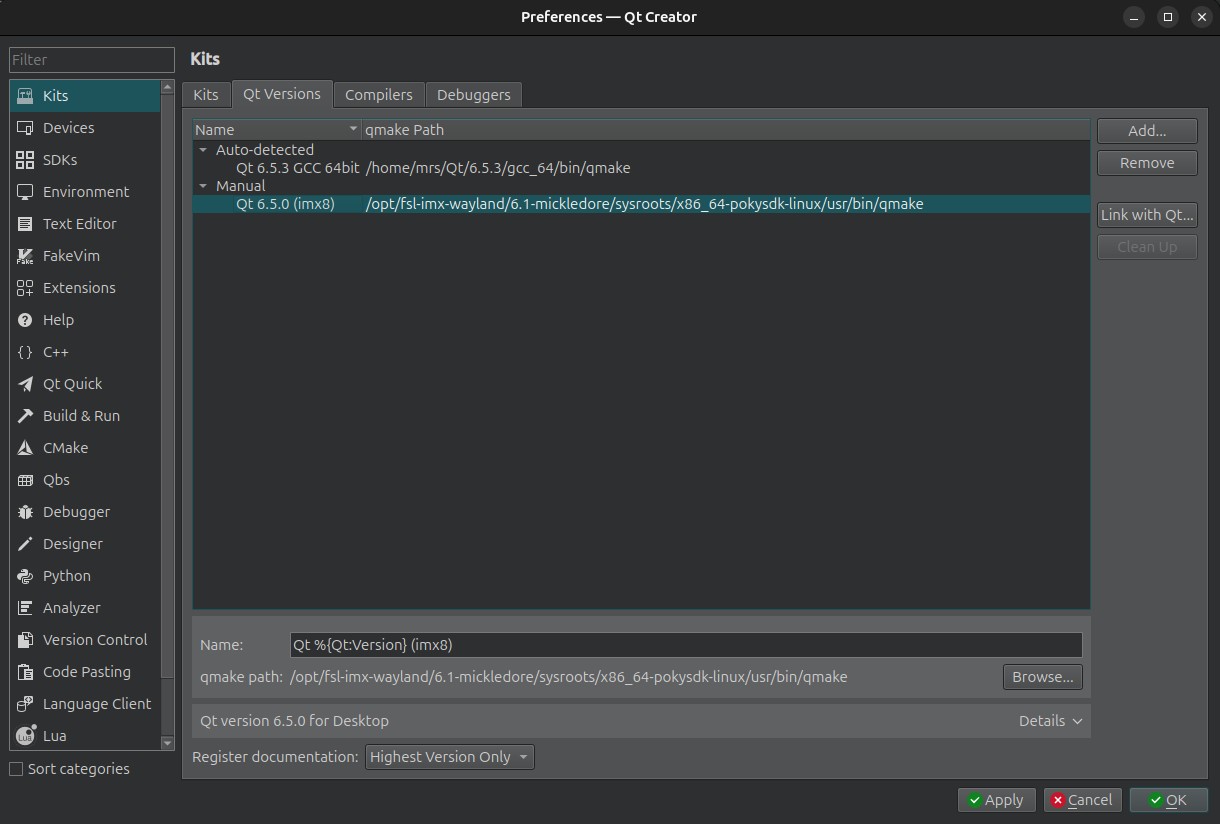
- Click “Add” and give it the name
Qt %{Qt:Version} (imx8). The qmake path is:/opt/fsl-imx-wayland/6.1-mickledore/sysroots/x86_64-pokysdk-linux/usr/bin/qmake - Click on the Kits tab
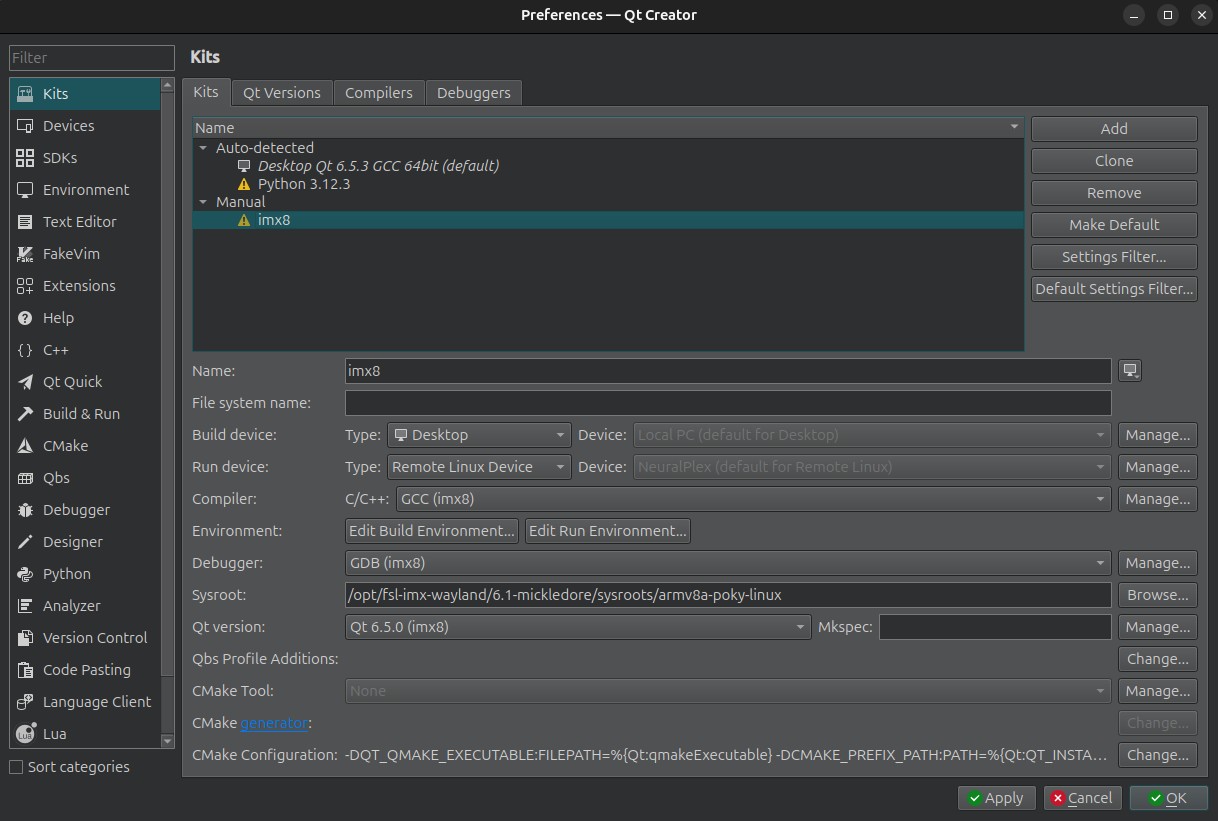
- Click “Add” and then in the name field, enter the name: imx8.
- In the Compiler C/C++ dropdown, select
GCC (imx8) - In the Debugger dropdown, select
GDB (imx8) - In the Qt version dropdown, select
Qt 6.8.1 (imx8)
- In the Compiler C/C++ dropdown, select
- Click “Apply”. You can now cross compile your software and run it on the display